Showing posts with label pink. Show all posts

October 17, 2014

P2 SECRET GLOSS lipstick*

Hello beauties. In today's little post I will talk a little more about the new very affordable lipstick, that I got just recently. It is from P2 and it's called Secret Gloss lipstick in the shade 030 secret sensation . It is very appropriate if you are not used to wear lipsticks, because it just looks like you are wearing a pigmented gloss. Let's begin with the packaging. It comes in a plastic coral tube with silver writing. The product itself, doesn't come with a lot of lip product, although it looks it does. The color of the lipstick is super bright orange, but when applied on your lips it changes to light pink-blush. The shade is absolutely gorgeous, but I would have to say it is more appropriate for summer days. It definitely brightens up your face and looks gorgeous on tan skin. The only bad thing about this product is that is not very longlasting. If you don't drink or eat, it lasts on your lips around two hours. The P2 Secret Gloss lipstick is available here, for only 4.87 €, 3.83 £, 6.16 $.


Živijo lepotičke. Danes bom z vami delila objavo o novi zelo dostopni šminki ki sem jo sprobala pred kratkim. To je P2 Secret Gloss šminka, v odtenku 030 secret sensation. Je zelo primerna za tise punce, ki niste navajene nositi šminke, saj je njen izgled bolj kot bi bile namazane z dobro pigmentiranim lipglosom. Končen videz vaših ustnic je čudovit glossy finiš. Začela bom z embalažo. Šminka je zapakirana v plastični oranžno koralni tubi s srebrnimi detajli. Same šminke ni veliko, zgolj 4 g. Barva šminke je zelo svetla in živa, in sicer je oranžna. Ko pa pride v stik z ustnicami pa spremeni barvo v svetlo roza-blush. Odtenek je preprosto čudovit, ampak moram reči da je nekoliko bolj primeren za poletne mesece. Definitivno osvetli celoten obraz, poleg tega pa izgleda čudovito na rahlo zagoreli koži. Edina slabost te šminkice je, da ni ravno dolgoobstojna. Če ne boste pile in jedla, bo na vaših ustnicah zdržala približno dve uri. P2 Secret Gloss šminko lahko kupite tukaj za samo 4.87 €, 3.83 £, 6.16 $.


Do you know the P2 cosmetic line, and do you like it?

 Comment, share, follow


August 21, 2014

CITY GIRL London*

Hello beauty lovers. In todays little post I will share with you what I got in the mail the other day. I was lucky enough to try and test the beauty set from Parisax. As you can see it comes in a beautiful box that opens like a book. On the left side we can see the details of the six products. Now let's get a look...
Firstly we have thick eyeliner. It is very creamy and higly pigmented. It glides on smoothly. Then there are false eyelashes. They come with a Natural eyelash glue. The lashes are super soft and the look pretty natural. I will be wearing them on Sunday and will update you about lasting. The third product in the beauty set is the cheek butter. A dual purpose lip and cheek color for fast application. Its silicone texture makes the blending easier and somewhat velvety finish. For me this was the first time using creme blush and I have to say that I love it. It is super pigmented and on my skin it looks much more natural then the powder does. Then we have a BB cream. This gathers products like moisturizer, facial serum, primer, foundation and even sunblock. The texture of the cream is super creamy, thick and it has amazing coverage. It is a bit too light for me, because my skin has a tan, but I applied it under my eyes to brighten them, and let me tell you that it covers just as much as my essence cover stick concealer does. Then you have a pink lipgloss. It is very moisturizing and gives my lips enough color in just one stroke. It is the most perfect pink lip colour. I am in love. It contains a purple undertone so it makes your teeth even whiter. Last product is just a regular black eyeliner, which works great on my waterline and it didn't smudge.
You can purchuase City Girl London beauty set right here for only 12.00 €, 9.61 £, 16.02 $.


Živjo punce. Danes bom z vami delila super paketek ličil, ki sem ga prejela za probo od Parisax. Kot vidite paketek izgleda kot knjiga in ko jo odprete na levi strani lahko vidimo opis izdelkov, na desni strani pa šest izdelkov za celoten look. No pa poglejmo kaj se nahaja v škatli... Najprej imamo debel svinčnik, ki ga nanesemo kot senčilo. Je izjemno kremast in zelo dobro pigmentiran. Nato sem takoj opazila umetne trepalnice. Te so zelo naravne in izredno mehke. Sicer jih še nisem sprobala, ker jih bom nosila v nedeljo in vam sporočim kako se obnesejo. Zraven je priloženo tudi lepilo za trepalnice, ki je naravnega izvora. Naslednja stvar v setu je kremno rdečilo. To se lahko uporablja za ustnice kot tudi za lička. Je izjemno dobro pigmentirano in se zelo dobro zabriše. Moram vam povedat, da nikoli prej nisem uporabljala kremnih rdečil, ampak po tem sem navdušena. Ker imam bolj suho kožo izgleda zelo naravno in trenutno ga imam raje kot tiste v prahu. Naslednja je na vrsti BB krema. Ta združuje vlažilno kremo, serum, podlago za nanos pudra, tekočo podlago in zaščitni faktor. Krema je izredno kremasta in dobro prekriva. Ker je zame v poletnih mesecih presvetla sem jo uporabila, da osvetlim del pod očmi, in moram vam povedati, da prekriva prav tako dobro kot essence cover stick concealer. Navdušena sem. Nato je na vrsti moj najljubši izdelek. To je roza lipglos, ki je kremast, ustnice vlaži, poleg tega pa je prekriven kot šminka. Je popolne barve, saj ima vijoličen oziroma moder podton, kar še posebej poudari bele zobe. Na koncu pa imamo še črn svinčnik za oči. Tega sem sprobala tako, da sem čez nanesla še črno senčilo in moram reči, da je na mojih učkah ostal cel dan.
Paketek City Girl London lahko kupite tukaj za samo 12.00 €.

 
NA KONCU PA ŠE PRESENEČENJE ZA BRALKE MOJEGA BLOGA. OD DANES IMATE  15% POPUSTA NA KATERIKOLI IZDELEK PO VAŠI IZBIRI V SPLETNI TRGOVINI PARISAX. NA BLAGAJNI SAMO VPIŠITE IME KUPONA - NIKA


February 14, 2014

NOTD: Valentine's Day

Happy Valentine's Day everyone! 
So it is here... In todays post I just want you to show you my mani for the Valentines Day weekend.
It is super simple. My base colour is light pink (pale). And on the top corner of every nail I draw a little red heart. It turned out super cute. If you think that it is a bit too much, then you could draw a little heart just on your ring finger. 


What mani are you wearing today? Let me know in the comments...

Please don't forget to FOLLOW my channel if you haven't already!

February 11, 2014

HOW TO SET FACE MAKE UP


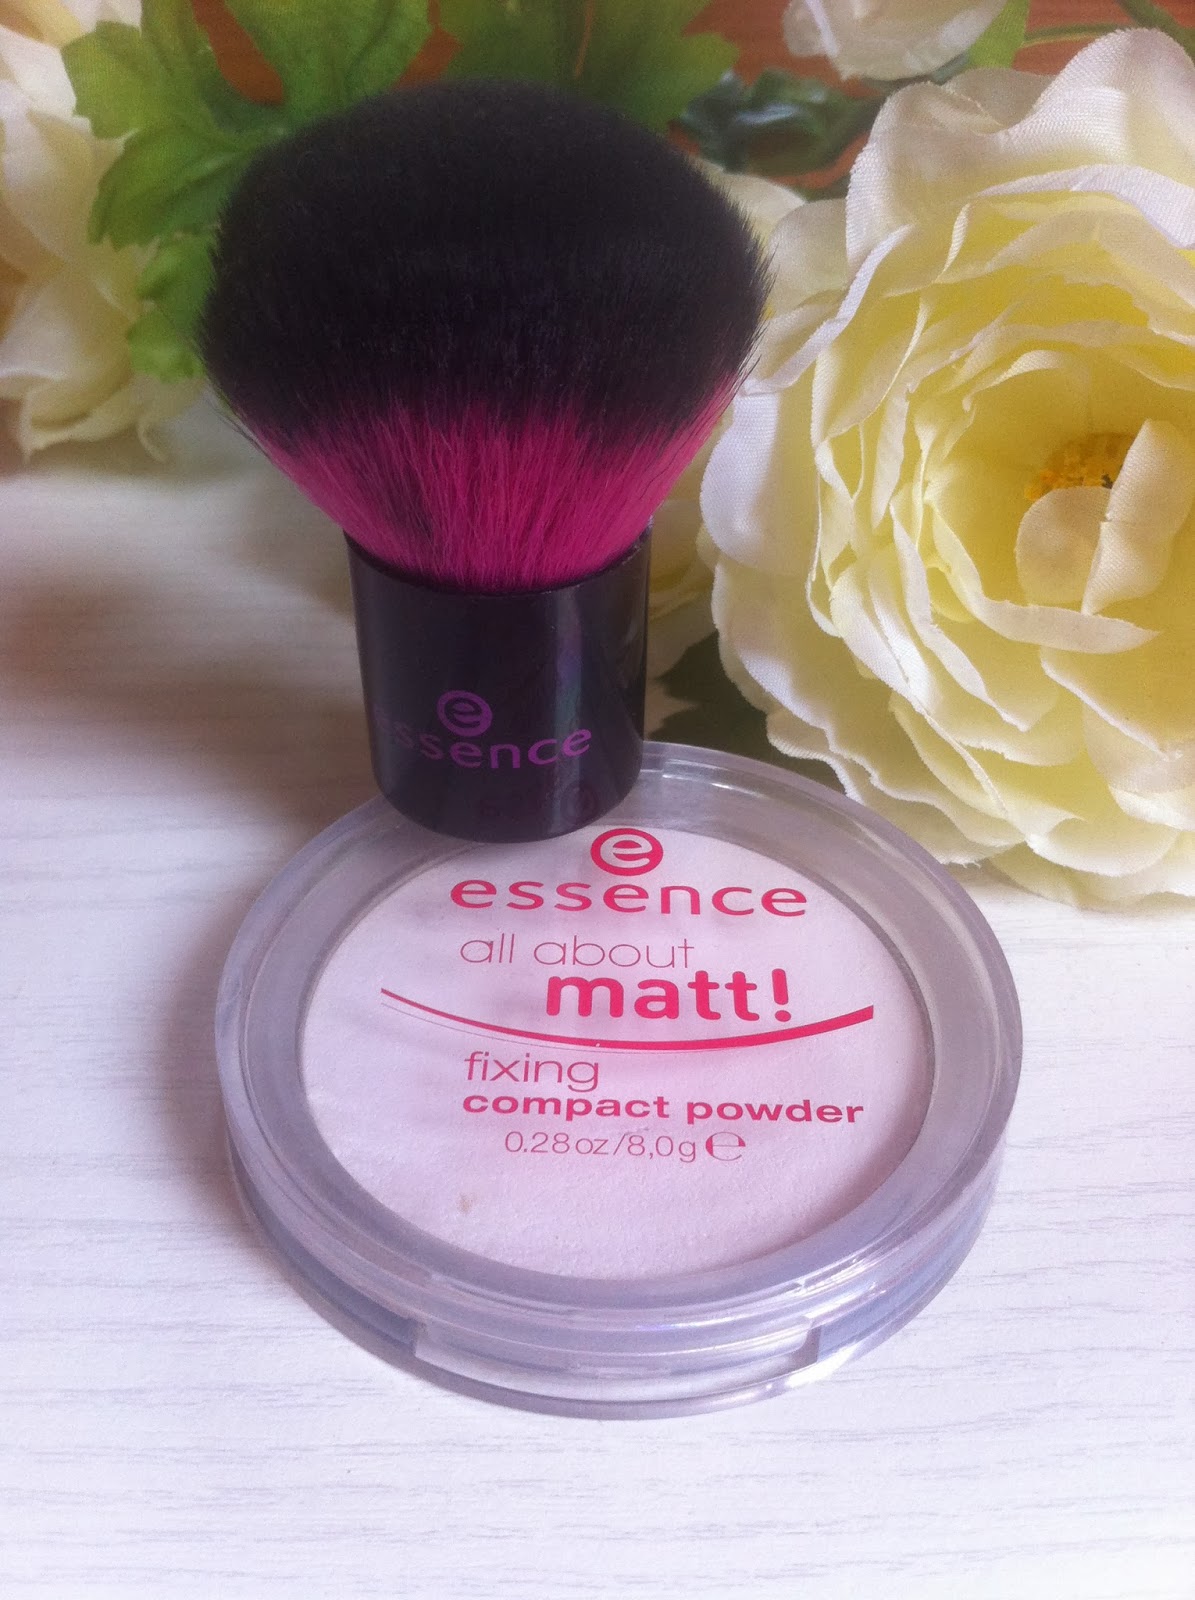
I have dry skin, so ever since a couple of months ago, when I started to using the fixing powder, I thought I don't need it. But I was wrong, so wrong... Like I mentioned I have dry skin, extremly dry under my eyes, and around my nose. But throughout the day I become oily on my T zone. I also wanted get my make up to last longer. When I was at the local drugstore about four months ago, I decided to buy some fixing powder... I was looking around and then picked the essence fixing compact powder. 

The packaging is cute, clear plastic with hot pink writing. It was super affordable, around 3 to 4 $. It depends where you buy it.  At first I was scared that I would look white, but then I noticed that it goes really smooth on your face. It also don't give you that ghost look (looks amazing on pictures).
After my foundation and concealer I put the powder on my T zone with essence kabuki brush. Really light and not too much product. Everywhere else I use bronzer or blush. After that I start contouring. I am really happy with this product because it helps me to look flawless all day long. Even when I am at school the girls are always jealous on my make up to look so flawless. And I touch it up just once a day, just before lunch time. You can't go wrong with it!!


What fixing powder do you use? Or what do you think of this one?

Thank you so much for reading and if you like my blog please follow


February 04, 2014

diy VINTAGE manicure


Hello dolls..

Today I am going to share with you my vintage style manicure with roses and polka dots. For this manicure I used five nailpolishes:
Am I blue or green form Catrice
Lollypop from Mybelline
White nailpolish from essence
Pink Blinges out from Kiss
Green from Kiss


1.      First I painted two nails with light pink nailpolish from Maybelline, and three with mint green from Catrice.
2.      I draw white dots on the two light pink nails with my essence dotting tool. It is super easy and they look so pretty.
3.      On green nails I draw roses with leaves and in between i put some white dots.
Everything probably looks easy, except the flowers, right? Let me tell you that they are much easier to do then they look :)


How to draw roses?
1.      With darker pink nail polish you draw big dot (I put three on one nail)
2.      With lighter pink nailpolish just draw three lines along the big dot
3.      With green nailpolish draw two lines outside the rose, one on each side

Now you are all done. Just put some top coat and you'll have super cute vintage style manicure with roses.

Thank you so much for reading and stopping by

May 25, 2013

DIY CRACKED EFFECT NAIL POLISH


Hello girls. I hope you are all doing well. As you can see I tried cracked effect nail polish from Depend. It was my first time using this kind of nailpolish and I totally fell in love with it. I bougt it on clearence in my drugstore for 1 €, £ 0.86, $ 1.3. It is pretty small, but that is not a problem for me. I picked up beautiful dark blue colour with small shimmers in it.

Let me tell you beauties, this stuff is crazy. It works so great and I love it. It is my new favourite nailpolish. I just didn't expected to work so good. First I applied two coats of Maybelline Colorama nailpolish in the shade Candy Bar. I recomend two to three coats for better coverage and more vibrant colour. When it dried I put one coat od Depend nail polish. And for a note girls. This nailpolish dries so quickly and you have to work super quick. When I dipped brush to put some extra nailpolish on the nail, it already start drying. The best thing is, that you don't need to wait until this dries, because it is an instant dry :) After a minute apply top coat over your nails to seal the manicure and this will lasts you for a long time. You are safe from chipping.

Tell me about your experiences with cracked effect nail polishes?
If you like reading my blog, please follow, it would mean a lot to me

May 19, 2013

NOTD - ALMOND SHAPE UV GEL

Hello my loves. Today I am going to show you my nails. They are made with uv gel and cured under the uv light. I did them by myself a few days ago with everything purchuesed in the drugstore. The coulour is plane - light pink, no special design. The main thing for me right now is to test them, see how long they are going to last me, compare the prices with the salon... They were a lot easier to do then I expected. Really super easy. I decided to go a bit different here, so I filed them into the almond shape. I went out of my comfort zone, because usually I wear them square. So anyway, if you are interested how to achieve professional uv gel nails at home, let me know in the comments, and after I test them I will do a step by step tutorial. 

Which nail shape do you prefer?

Have an awesome Sunday and I love you

May 05, 2013

OOTD - CLOUDY SUNDAY

Hello everybody. I missed you so much. It's been a while since I write a post, so today I decided to do an ootd. It is casual and comfy, perfect for lazy Sunday afternoon. It has been very chilly lately where I live, so unfortunately no shorts for me yet.

As you can see my outfit is very simple, with a navy blue sweater for a cloudy day and of course my white converse. They are not dirty yet :)
Do you notice anything weird on the pictures??
Let me help you: my socks. I mix and match my them all the time, so one is orange and the other one is pink. Do you find this weird?

Have an amazing day